Linux Server Hardening Guide 2026: Complete Security Checklist

Securing modern infrastructure starts with a comprehensive linux server hardening guide 2026 that systematically protects against unauthorized access, network intrusion, and service compromise. Whether you deploy critical workloads in a cloud environment, manage dedicated physical servers in an enterprise data center, or operate hybrid virtualization clusters, server security requires deliberate configuration and disciplined operational hygiene. In this in-depth guide, we will step through every essential tier of production hardening for Ubuntu and Debian systems.
A rigorous linux server hardening guide 2026 is not merely a one-time checklist, but a sustained security architecture. Modern threat vectors in 2026 frequently target weak default configurations, exposed administrative management interfaces, unpatched packages, and permissive user access privileges. By applying defense-in-depth principles across user permissions, SSH daemon configurations, packet filtering firewalls, intrusive kernel hardening parameters, automated security patches, and intrusion detection frameworks, you create multiple layers of protection that make compromise exceptionally difficult for adversaries.
Why Following a Linux Server Hardening Guide 2026 Is Critical
Modern Linux servers power the backbone of enterprise applications, software development pipelines, and artificial intelligence model inference engines. As highlighted in our guides on how to install Ollama on Ubuntu 24 and installing Ollama on Debian 12, modern server deployments frequently expose powerful internal APIs and computation workflows that must be rigorously shielded from untrusted networks. Deploying high-value software without a structured linux server hardening guide 2026 exposes your organization to severe downtime, data leakage, and automated credential stuffing campaigns.
Every administrative decision you make—from disabling root password logins to enforcing strict boundary policies—contributes directly to reducing your external attack footprint. According to the foundational security standards established by the CIS Ubuntu Linux Benchmark, standardizing server baselines significantly mitigates automated exploit toolkits and zero-day exposure. Let us begin by securing the most fundamental attack surface: user accounts and administrative privilege separation.
Step 1: User Account Security and Administrative Privilege Separation
The first imperative in our linux server hardening guide 2026 is eliminating direct administrative access under the root account. Default accounts with global root access present a catastrophic risk because automated bots incessantly target the root user name over public SSH ports.
1. Create a Dedicated Administrative User with Sudo Access
Never conduct day-to-day administrative tasks or deployment maintenance while logged in directly as root. Instead, provision a dedicated administrator user account equipped with granular sudo privileges:
2
3
4
5
6
7
8
adduser sysadmin_sec
# Add the new administrative user to the sudo group
usermod -aG sudo sysadmin_sec
# Verify group membership
id sysadmin_sec
2. Enforce Strict Password Policies and Authentication Hygiene
Even when key-based authentication is enforced, system passwords must resist brute-force cracking attempts. In Ubuntu and Debian environments, install and configure the Pluggable Authentication Modules (PAM) password quality enforcement module:
Edit the configuration file at
1 | /etc/security/pwquality.conf |
to mandate robust entropy standards:
2
3
4
5
6
7
minlen = 16
dcredit = -1
ucredit = -1
lcredit = -1
ocredit = -1
maxrepeat = 3
These settings require all local passwords to contain at least 16 characters including uppercase letters, lowercase letters, numbers, and special symbols, satisfying modern enterprise standards outlined in any professional linux server hardening guide 2026.
Step 2: Securing OpenSSH Daemon Configuration
The SSH daemon is the primary doorway into any remote Linux machine. Hardening OpenSSH prevents brute-force credential stuffing and unauthorized terminal sessions. Open the main daemon configuration file:
Using a drop-in file within
1 | /etc/ssh/sshd_config.d/ |
is the recommended modern approach in Ubuntu and Debian systems because it preserves distribution updates while applying custom security overrides cleanly.
Essential OpenSSH Security Directives
Add the following hardened directives to the configuration file:
2
3
4
5
6
7
8
9
10
11
12
13
14
15
16
17
18
19
20
21
22
23
24
25
PermitRootLogin no
# Disable insecure password-based authentication
PasswordAuthentication no
ChallengeResponseAuthentication no
KbdInteractiveAuthentication no
# Enforce public key authentication only
PubkeyAuthentication yes
# Restrict maximum authentication attempts per connection
MaxAuthTries 3
# Disconnect idle or unauthenticated sessions quickly
LoginGraceTime 30
ClientAliveInterval 300
ClientAliveCountMax 2
# Disable X11 and TCP forwarding unless strictly required
X11Forwarding no
AllowTcpForwarding no
# Restrict SSH access to specific trusted user accounts
AllowUsers sysadmin_sec
Before restarting the SSH daemon, always validate the syntax to ensure you do not accidentally lock yourself out of the remote server:
2
3
4
5
sudo sshd -t
# Apply new configuration if no errors were returned
sudo systemctl restart ssh
Always maintain your active terminal session open in one window while testing a completely new login from a second terminal window. Confirming your cryptographic SSH key authentication functions properly before disconnecting is a cardinal rule emphasized by every experienced administrator and highlighted throughout this linux server hardening guide 2026.
Step 3: Network Security, UFW Firewall, and Fail2ban Implementation
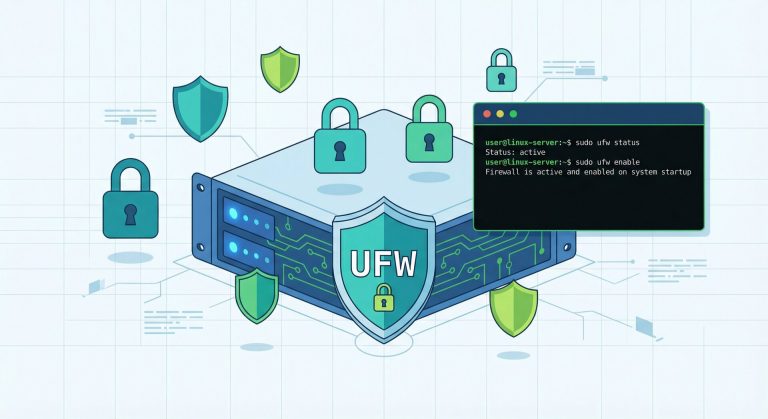
Network isolation and traffic filtering form the second line of defense in our linux server hardening guide 2026. By default, any unmonitored open port presents an attack vector. We combine the Uncomplicated Firewall (UFW) with Fail2ban to block unauthorized connections and ban offending IP addresses automatically.
1. Configuring UFW (Uncomplicated Firewall)
UFW provides a streamlined interface for netfilter rules. Establish a strict default-deny ingress policy before allowing necessary services:
2
3
4
5
6
7
8
9
10
11
12
13
14
15
16
17
sudo ufw --force reset
# Set default policies: block incoming, allow outgoing
sudo ufw default deny incoming
sudo ufw default allow outgoing
# Allow OpenSSH service (adjust port if running on a custom port)
sudo ufw allow OpenSSH
# If running web services, permit encrypted HTTP and HTTPS traffic
sudo ufw allow 80/tcp
sudo ufw allow 443/tcp
# Enable firewall and check status
sudo ufw --force enable
sudo ufw status verbose
2. Deploying Fail2ban for Automated Intrusion Prevention
Fail2ban monitors system authentication log files and dynamically injects firewall drop rules against IP addresses exhibiting malicious behavioral patterns, such as multiple failed login attempts. Official documentation and threat intelligence updates are maintained by the Fail2ban Open Source Project.
2
3
4
5
sudo apt-get install -y fail2ban
# Create local jail configuration file
sudo cp /etc/fail2ban/jail.conf /etc/fail2ban/jail.local
Edit
1 | /etc/fail2ban/jail.local |
to configure aggressive ban times and threshold parameters:
2
3
4
5
6
7
8
9
10
11
12
13
14
15
16
17
18
# Ban hosts for 24 hours after repeated offenses
bantime = 86400
# Window of time to evaluate failed attempts
findtime = 600
# Number of failures before triggering a ban
maxretry = 3
# Notification backend
backend = systemd
[sshd]
enabled = true
port = ssh
logpath = %(sshd_log)s
backend = %(default_backend)s
Start and enable the Fail2ban service, then inspect active jail status:
2
sudo fail2ban-client status sshd
Implementing active intrusion mitigation ensures your infrastructure resists continuous automated attacks, an indispensable baseline in this linux server hardening guide 2026.
Step 4: Automated Security Patching with Unattended-Upgrades
Outdated software packages containing publicly known Common Vulnerabilities and Exposures (CVEs) represent one of the most common ingress methods for threat actors. Our linux server hardening guide 2026 mandates automated installation of security updates so your systems are patched immediately without requiring manual intervention.
Install and configure the
1 | unattended-upgrades |
package on your Ubuntu or Debian servers:
2
3
4
5
sudo apt-get install -y unattended-upgrades update-notifier-common
# Trigger interactive setup to enable automated updates
sudo dpkg-reconfigure --priority=low unattended-upgrades
Inspect the configuration file at
1 | /etc/apt/apt.conf.d/50unattended-upgrades |
to ensure only trusted security origins are enabled and automatic reboots for kernel patches are scheduled during maintenance windows:
2
3
4
5
6
7
8
Unattended-Upgrade::Allowed-Origins {
"${distro_id}:${distro_codename}-security";
};
# Automatically reboot if kernel updates require it (at 03:30 AM)
Unattended-Upgrade::Automatic-Reboot "true";
Unattended-Upgrade::Automatic-Reboot-Time "03:30";
Test the automated patch mechanism using dry-run simulation mode to ensure smooth operation:
Automated patch deployment dramatically narrows your vulnerability window, reinforcing every principle documented in our linux server hardening guide 2026.
Step 5: Kernel Hardening via Sysctl Parameters
The Linux kernel governs process memory, networking stacks, and system hardware interactions. Applying hardened sysctl network and virtual memory parameters closes architectural loopholes such as SYN flood denial-of-service, IP spoofing, and malicious packet redirection. Create a dedicated kernel hardening profile:
Insert the following battle-tested configuration directives:
2
3
4
5
6
7
8
9
10
11
12
13
14
15
16
17
18
19
20
21
22
23
24
25
26
27
28
29
30
net.ipv4.conf.all.rp_filter = 1
net.ipv4.conf.default.rp_filter = 1
# Disable ICMP redirect acceptance (prevents MITM attacks)
net.ipv4.conf.all.accept_redirects = 0
net.ipv4.conf.default.accept_redirects = 0
net.ipv6.conf.all.accept_redirects = 0
net.ipv6.conf.default.accept_redirects = 0
# Disable IP source routing
net.ipv4.conf.all.accept_source_route = 0
net.ipv4.conf.default.accept_source_route = 0
net.ipv6.conf.all.accept_source_route = 0
net.ipv6.conf.default.accept_source_route = 0
# Enable TCP SYN cookies to defend against SYN flood attacks
net.ipv4.tcp_syncookies = 1
# Ignore broadcast ICMP ping requests
net.ipv4.icmp_echo_ignore_broadcasts = 1
# Restrict access to kernel dmesg log buffer to root only
kernel.dmesg_restrict = 1
# Prevent unprivileged users from loading BPF programs
kernel.unprivileged_bpf_disabled = 1
# Disable core dumps for setuid executables
fs.suid_dumpable = 0
Load and activate the new kernel security configuration immediately without rebooting the server:
Hardening network protocol handling at the kernel tier forms a cornerstone of any professional linux server hardening guide 2026, neutralizing low-level network attacks before they reach higher application layers.
Step 6: Filesystem Security, Shared Memory, and Mount Flags
Filesystem hardening restricts where executable binaries and scripts can be run from, preventing attackers from staging malicious toolkits in temporary directories like
1 | /tmp |
and shared memory (
1 | /dev/shm |
).
1. Hardening Temporary Directories in /etc/fstab
Add protective mount options (
1 | noexec |
,
1 | nosuid |
,
1 | nodev |
) to volatile memory mounts in
1 | /etc/fstab |
:
2
3
tmpfs /tmp tmpfs defaults,rw,nosuid,nodev,noexec,relatime 0 0
tmpfs /dev/shm tmpfs defaults,rw,nosuid,nodev,noexec,relatime 0 0
Remount the partitions to enforce execution restrictions:
2
sudo mount -o remount /dev/shm
2. Monitoring World-Writable Files and SUID Binaries
Attackers frequently seek out misplaced SetUID (SUID) binaries to escalate local privileges to root. As part of your regular maintenance routine outlined in this linux server hardening guide 2026, execute regular audits to catalogue all SUID and SGID executables on your system:
2
3
4
5
sudo find / -perm /4000 -type f -exec ls -ld {} + 2>/dev/null
# Identify world-writable directories without sticky bit
sudo find / -type d \( -perm -0002 -a ! -perm -1000 \) 2>/dev/null
Any unexpected binary marked with SetUID permissions should be inspected immediately and stripped of elevated privileges using
1 | chmod u-s /path/to/binary |
if unnecessary for routine operations.
Step 7: Automated Auditing and Compliance Verification with Lynis
How do you verify whether your configuration satisfies enterprise compliance frameworks? Rather than guessing, use Lynis, an industry-standard open-source security auditing tool developed by CIS-certified experts. Details and rule databases are available from the CISOfy Lynis Security Tool Project.
Install and execute an automated system audit using Lynis:
2
3
4
5
sudo apt-get install -y lynis
# Run a non-interactive comprehensive security scan
sudo lynis audit system --quick
Lynis evaluates your system across hundreds of security categories, generating a comprehensive Hardening Index score alongside specific remediation recommendations. Incorporating recurring Lynis scans into your CI/CD maintenance pipeline guarantees that your implementation of this linux server hardening guide 2026 remains resilient against configuration drift.
Step 8: Centralized Logging and Auditd Monitoring
The Linux Audit Daemon (
1 | auditd |
) provides granular tracking of system calls, file integrity modifications, and security events. When an unauthorized event occurs, audit logs provide the decisive forensics needed to identify the intrusion root cause.
2
3
4
5
sudo apt-get install -y auditd audispd-plugins
# Enable and start the audit daemon
sudo systemctl enable --now auditd
Configure critical file integrity watches in
1 | /etc/audit/rules.d/audit.rules |
:
2
3
4
5
6
7
8
-w /etc/passwd -p wa -k identity
-w /etc/shadow -p wa -k identity
-w /etc/group -p wa -k identity
-w /etc/sudoers -p wa -k sudoers_changes
# Monitor OpenSSH daemon configuration
-w /etc/ssh/sshd_config -p wa -k sshd_config
Reload the audit rules and verify active event tracking:
2
sudo auditctl -l
Granular auditing transforms your server from a passive target into a monitored, tamper-evident platform capable of alerting engineers to unauthorized tampering in real time.
Production Hardening Checklist 2026
To summarize our complete linux server hardening guide 2026, verify that your production systems meet each of the following verification milestones:
- Direct root login disabled over SSH and dedicated sudo accounts provisioned.
- SSH password authentication disabled in favor of cryptographic public-private keypairs.
- UFW firewall configured with a default-deny ingress posture, permitting only necessary ports.
- Fail2ban active with aggressive ban durations and automated systemd log analysis.
- Unattended-upgrades enabled for immediate deployment of security patches and critical CVEs.
- Sysctl kernel parameters hardened against SYN floods, ICMP redirects, and IP spoofing attacks.
- Temporary partitions mounted with noexec, nosuid, and nodev restrictions.
- SUID binaries audited and unexpected privilege escalation vectors eliminated.
- Automated compliance verification performed regularly with Lynis audits.
- Auditd rules deployed to monitor authentication databases and administrative configuration changes.
Frequently Asked Questions (FAQ)
Does changing the default SSH port enhance security?
Changing the SSH port from 22 to a non-standard port reduces automated log noise from simple internet bots, but it does not replace core authentication security. Enforcing cryptographic SSH keys, disabling password authentication, and implementing Fail2ban are far more critical steps highlighted in this linux server hardening guide 2026.
Can unattended-upgrades cause unexpected system downtime?
When properly configured to apply only official security repository packages, unattended-upgrades rarely introduce breaking changes. To ensure zero unexpected service disruption, schedule automatic kernel reboots during low-traffic maintenance windows (e.g., 03:30 AM) and configure email notifications for reboot events.
How frequently should security audits with Lynis be executed?
In high-security production environments, schedule automated Lynis audits weekly via systemd timers or cron jobs, exporting reports to a centralized monitoring dashboard to identify unexpected configuration changes immediately.
Recommended Reading: System administrators seeking distribution-specific blueprints should consult our comprehensive Ubuntu-focused security hardening walkthrough as well as our Debian 12 production security baseline.
Conclusion: Sustaining Server Security in 2026
Implementing a comprehensive linux server hardening guide 2026 establishes an impenetrable foundation for your modern digital infrastructure. Server security is not an isolated configuration milestone, but an ongoing operational discipline. By pairing strict identity controls and perimeter firewalls with automated patching and kernel tuning, you safeguard critical enterprise data against the evolving cyber threat landscape of 2026 and beyond.
- About the Author
- Latest Posts

Mark is a senior content editor at Text-Center.com and has more than 20 years of experience with linux and windows operating systems. He also writes for Biteno.com