How to Secure Ubuntu Server 2026: Complete Livepatch and Hardening Guide

Ubuntu Server Security in 2026: The Complete Guide
Securing an Ubuntu server in 2026 requires more than just installing updates and enabling a firewall. With the rise of sophisticated cyber threats and the increasing complexity of infrastructure, modern server security demands a layered approach combining proactive patching, strict hardening, and continuous monitoring. This comprehensive guide walks you through everything you need to know to secure your Ubuntu server using the latest tools and best practices, including Ubuntu Livepatch for zero-downtime kernel updates.
Whether you’re running Ubuntu 22.04 LTS or the newer 24.04 LTS, this tutorial will show you how to implement enterprise-grade security on your server without sacrificing uptime or performance. We’ll cover Ubuntu Livepatch, firewall configuration, SSH hardening, and automated security updates—all the critical components of a robust security posture.
Why Ubuntu Server Security Matters More Than Ever
Linux servers power the majority of the world’s critical infrastructure, from web servers and databases to cloud platforms and containerized applications. Ubuntu Server, with its regular LTS releases and strong community support, is one of the most popular choices for production environments. However, this popularity also makes it a prime target for attackers.
In 2026, server security isn’t optional—it’s mandatory. Data breaches, ransomware attacks, and supply chain compromises continue to escalate, and poorly secured servers are often the entry point. The good news is that Ubuntu provides powerful built-in security features and tools like Ubuntu Pro and Livepatch that make hardening your server straightforward and sustainable.
What is Ubuntu Livepatch?
Ubuntu Livepatch is a revolutionary security feature that applies critical kernel security patches to your Ubuntu server while it’s running, eliminating the need for disruptive reboots. This is particularly valuable for production servers where downtime translates directly to lost revenue or service disruptions.
Here’s how Livepatch works: when a kernel vulnerability is discovered and patched, Canonical’s security team prepares a live kernel patch that modifies the running kernel’s memory directly. Your server receives this patch automatically, applies it in-memory, and continues operating without interruption. You get the security fix immediately—no scheduling maintenance windows or waiting for off-hours to reboot.
Livepatch is available as part of Ubuntu Pro, which is free for personal use on up to five machines. For organizations, Ubuntu Pro extends security coverage beyond the main archive to include thousands of additional packages in the universe and multiverse repositories, making it an essential tool for comprehensive server security.
Step 1: Install and Set Up Ubuntu Server
Before we dive into security configurations, ensure you have a clean Ubuntu Server installation. For maximum security and support, always choose an LTS (Long Term Support) release—either Ubuntu 22.04 LTS or 24.04 LTS as of 2026.
During installation, follow these security-first practices:
- Use full-disk encryption (LUKS) to protect data at rest, especially important for physical servers or VPS instances you don’t fully control
- Create separate partitions for
1/var
,
1/tmp, and
1/hometo isolate system, temporary, and user data
- Set up a non-root user with sudo privileges instead of using the root account directly
- Configure a static IP address or reserve a DHCP lease for your server to ensure consistent network access
- Disable unnecessary services during installation—start minimal and add only what you need
After the initial installation, update all packages immediately:
2
3
sudo apt full-upgrade -y
sudo reboot
This ensures you’re starting from the latest security baseline before implementing additional hardening measures.
Step 2: Enable Ubuntu Pro and Activate Livepatch
Enabling Ubuntu Pro and Livepatch is one of the most impactful security steps you can take. It provides extended security maintenance for thousands of packages and eliminates the kernel reboot window where your server remains vulnerable to known exploits.
First, create a free Ubuntu Pro account at ubuntu.com/pro. You’ll receive a token that authorizes your server for Ubuntu Pro features.
Attach your server to Ubuntu Pro:
Once attached, enable Livepatch:
Verify that Livepatch is active and check which patches have been applied:
You should see output indicating that Livepatch is running and listing any applied kernel patches. From this point forward, your server will receive critical kernel security updates automatically without requiring reboots.
This is a game-changer for production environments. Instead of waiting days or weeks to schedule a maintenance window for a critical kernel patch, Livepatch applies the fix within hours of release—dramatically reducing your exposure window.
Step 3: Harden SSH Access
SSH is the primary remote access method for Linux servers, making it a prime target for brute-force attacks and credential stuffing. Hardening SSH configuration is non-negotiable for any internet-facing server.
Edit the SSH daemon configuration:
Apply these critical hardening settings:
2
3
4
5
6
7
8
9
PasswordAuthentication no
PubkeyAuthentication yes
ChallengeResponseAuthentication no
UsePAM yes
X11Forwarding no
AllowUsers yourusername
MaxAuthTries 3
LoginGraceTime 30
Here’s what each setting does:
- PermitRootLogin no: Disables direct root login, forcing attackers to know both a valid username and credentials
- PasswordAuthentication no: Disables password-based authentication entirely, requiring SSH keys (much more secure)
- AllowUsers yourusername: Whitelist specific users who can SSH in—only these accounts will be permitted
- MaxAuthTries 3: Limits authentication attempts to three per connection, slowing brute-force attacks
- LoginGraceTime 30: Disconnects unauthenticated connections after 30 seconds
Important: Before disabling password authentication, ensure you have SSH key-based authentication configured and tested. Generate an SSH key pair on your client machine:
Copy the public key to your server:
Test the key-based login from a new terminal session before disabling password authentication. Once confirmed working, reload SSH:
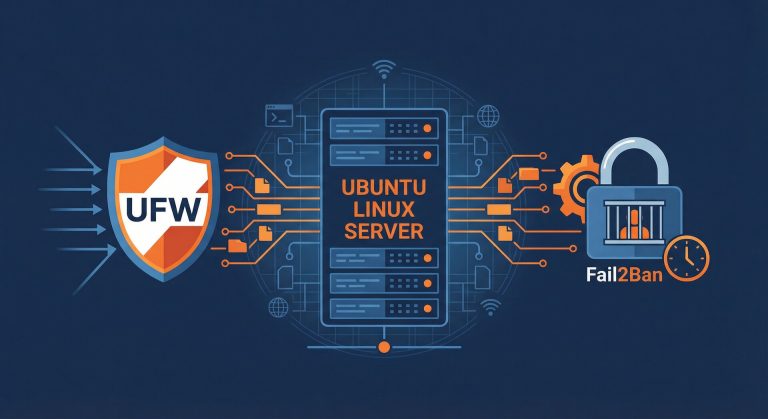
For additional protection, consider installing and configuring fail2ban, which automatically bans IP addresses that show malicious signs such as too many password failures or port scanning:
2
3
sudo systemctl enable fail2ban
sudo systemctl start fail2ban
Step 4: Configure the UFW Firewall
Ubuntu includes UFW (Uncomplicated Firewall), a user-friendly frontend for iptables that makes firewall configuration straightforward even for beginners. A properly configured firewall is your first line of defense against network-based attacks.
Enable UFW with a secure default policy—deny all incoming traffic and allow all outgoing traffic:
2
sudo ufw default allow outgoing
Allow SSH before enabling the firewall (critical—don’t lock yourself out!):
If you’re running web services, allow HTTP and HTTPS:
2
sudo ufw allow 443/tcp
For database servers or application backends that should only be accessible from specific networks, use source IP restrictions:
This allows PostgreSQL connections only from the 192.168.1.0/24 network, blocking all other access attempts.
Enable the firewall:
Check the status and active rules:
UFW will now block all incoming connections except those explicitly allowed. Regularly review your firewall rules and remove any that are no longer needed—principle of least privilege applies to network access as much as file permissions.
Step 5: Enable Automatic Security Updates
Manually updating packages is error-prone and doesn’t scale, especially if you manage multiple servers. Ubuntu’s unattended-upgrades package automates security updates, ensuring critical patches are applied promptly without manual intervention.
Install and configure unattended-upgrades:
2
sudo dpkg-reconfigure --priority=low unattended-upgrades
Select “Yes” when prompted to automatically install security updates.
Review the configuration file to customize behavior:
Key settings to verify:
-
1Unattended-Upgrade::Allowed-Origins
: Ensure security updates are enabled
-
1Unattended-Upgrade::Automatic-Reboot "false";
: Control automatic reboots (you may want to keep this false if using Livepatch for kernel updates)
-
1Unattended-Upgrade::Mail "root";
: Receive email notifications when updates are applied
With Ubuntu Pro and Livepatch enabled, unattended-upgrades will apply user-space security updates automatically, while Livepatch handles kernel vulnerabilities without reboots—a powerful combination for maintaining security with minimal downtime.
Step 6: Implement Systemd Service Hardening
Modern Ubuntu uses systemd to manage services, and systemd provides powerful security features that isolate services and limit their capabilities. Every service you run should be sandboxed to minimize the impact of a potential compromise.
For any custom services or third-party applications, edit the systemd unit file and add hardening directives:
2
3
4
5
6
7
8
ProtectSystem=strict
ProtectHome=yes
NoNewPrivileges=yes
PrivateTmp=yes
ReadWritePaths=/var/lib/myapp
User=myappuser
Group=myappgroup
Here’s what these directives do:
- ProtectSystem=strict: Makes the entire filesystem read-only except paths explicitly listed in
1ReadWritePaths
- ProtectHome=yes: Makes user home directories inaccessible to the service
- NoNewPrivileges=yes: Prevents the service from gaining additional privileges through setuid binaries or similar mechanisms
- PrivateTmp=yes: Gives the service a private
1/tmp
directory, isolated from other processes
- User/Group: Runs the service as a dedicated non-privileged user instead of root
After editing a unit file, reload systemd and restart the service:
2
sudo systemctl restart myservice
These settings significantly reduce the attack surface of each service and contain potential breaches.
Step 7: Monitor Logs and Set Up Intrusion Detection
Security isn’t a one-time configuration—it’s an ongoing process. Monitoring system logs and setting up intrusion detection helps you identify and respond to security incidents quickly.
Ubuntu uses journald for centralized logging. View recent security-relevant logs:
2
3
sudo journalctl -u ssh
sudo journalctl --since "1 hour ago"
For more sophisticated monitoring, consider installing AIDE (Advanced Intrusion Detection Environment), which creates a database of file checksums and alerts you to unauthorized changes:
2
3
sudo aideinit
sudo cp /var/lib/aide/aide.db.new /var/lib/aide/aide.db
Run periodic checks:
AIDE will report any files that have been modified, added, or removed since the last check—helping you detect tampering or malware.
For real-time monitoring, tools like OSSEC or Wazuh provide comprehensive host-based intrusion detection with alerting and compliance reporting capabilities.
Step 8: Regular Security Audits and Maintenance
Even with automated updates and monitoring, regular manual security audits are essential. Schedule quarterly reviews to:
- Review user accounts and remove inactive or unnecessary accounts
- Audit sudo privileges and ensure only authorized users have elevated access
- Check for listening network services with
1sudo ss -tlnp
and close anything unnecessary
- Review firewall rules and tighten restrictions where possible
- Verify backup integrity and test restore procedures
- Update SSL/TLS certificates and review cryptographic configurations
Use tools like Lynis for automated security audits:
2
sudo lynis audit system
Lynis will scan your system and provide a detailed security report with recommendations for improvement.
Related Security Guides: If you are managing IoT or ARM64 infrastructure, see our guide on rebootless kernel patching on Ubuntu Core 26. For comprehensive infrastructure protection, consult the enterprise Linux security checklist for 2026.
Conclusion
Securing an Ubuntu server in 2026 requires a comprehensive, layered approach combining proactive patching, strict access controls, network security, and continuous monitoring. By implementing Ubuntu Livepatch for zero-downtime kernel updates, hardening SSH access, configuring a firewall, enabling automatic security updates, and regularly auditing your system, you create a robust defense against modern threats.
The tools and techniques covered in this guide represent current best practices for Ubuntu server security. Remember that security is not a destination but an ongoing journey—stay informed about new vulnerabilities, keep your systems updated, and regularly review and improve your security posture.
For more advanced topics like FIPS compliance, SELinux/AppArmor mandatory access controls, and enterprise identity integration, consult the official Ubuntu Server documentation and LinuxSecurity.com for the latest security advisories. Your server’s security is only as strong as your commitment to maintaining it.
- About the Author
- Latest Posts

Mark is a senior content editor at Text-Center.com and has more than 20 years of experience with linux and windows operating systems. He also writes for Biteno.com